Tools:

  • Round, Large Paintbrush
  • Scissors

Supplies & Materials:

  • Snowflake Decal
  • Dark Blue Acrylic Paint
  • Light Blue Acrylic Paint
  • Spray Adhesive (Acid Free Formula)
  • Polar Ice Shavings

Frosted Snowflake

Frosted Snowflakes

What a grand idea for holiday decorations! This is truly a beautiful display and will get lots of attention at holiday parties!!!

Below you will find step-by-step directions on how to create this one of a kind piece. Of course you can add your own details and different colors to suit your taste. What you will find out is that it doesn't take much to create something so unique to fit your personality.


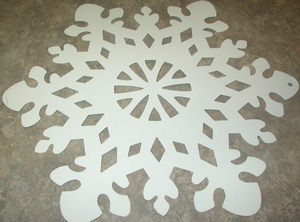
Start with a clean snowflake design

Materials -Part I

This is a thin cardboard cut out of a simple snowflake design. These can be found at any party supply store or even at school/teaching supply shops.

This particular design came in a set of 12 at a very inexpensive cost. I've had these for numerous years as just plain white, but decided to spruce them up a bit for a holiday party. With just a few simple materials and less than 15 minutes each, you will have a winter wonderland inside your house!

Materials

Materials- Part II

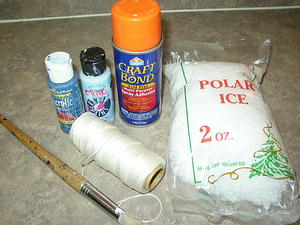
As up can see in the picture (photo on left) it doesn't take much to create these beautiful frosted snowflakes.

It takes 2 shades of blue (your choice), spray adhesive (make sure it is the Acid Free formula for longevity), Polar Ice flakes (can be found at any craft store), simple round tip paintbrush and string to hang them up.


Step 1

Step 1

First, make sure you have craft paper or any other type of paper that will protect your worktable. I prefer brown craft paper as it doesn't slip around too much.

Make sure both sides are clean and ready to paint. No need to prime, it should be ready to paint.


Light and Dark Blue Paint applied

Step 2

Next you will paint the first layer with the light blue acrylic paint. You don't have to be too perfect with the painting ....snowflakes aren't perfect! I leave a bit of the white background to show through.

After you have painted both sides, you are ready to paint the center part with the medium or dark blue paint. I like to blend the two colors together (I do this by painting on top of the light blue paint while it is still wet). Apply the darker blue (starting from the center out) in a circular motion with the paintbrush. This adds interest and texture to the snowflake. Once again...don't try to make the snowflakes too perfect....let them have a personality of their own.

Time for the frosting

Step 3

The final part to frosting the snowflake is to add the icing! With the spray adhesive, lightly spray the center area until it reaches the mid part of the snowflake.

While it is still tacky, take a handful of the polar ice and apply it generously to the snowflake.

You can immediately pat it down with your hand to compress it. Once it dries, it will stay on there for a very long time!!

Do the other side the same way.

Frosted Snowflake 1

Finale 1

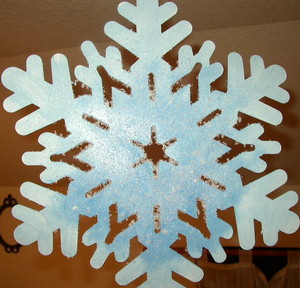
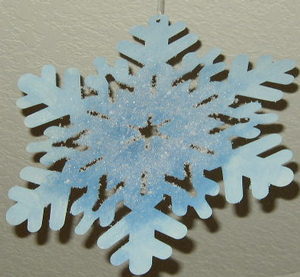
What a beautiful piece of work! The photo on the left doesn't really show the sparkle of the snowflake...but trust me....it shines!

Take some of the string and thread it through one of the holes (you may have to use a hole punch to create one for the string). Tie it on the end and hang it from the ceiling.


Close up

Finale 2

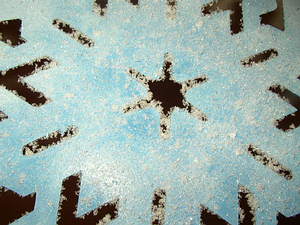
This is a close up of the snowflake to show you the frosting on it. You can add a little or a lot of it on each snowflake. It's really up to you to decide.


Frosted Snowflake 2

Finale 3

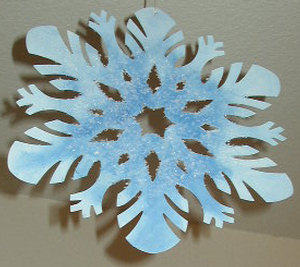
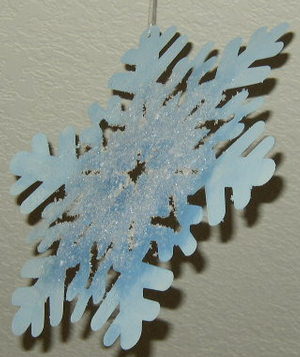
You can really see the colors stand out on this one. You can also reverse the colors, so that the bottom layer is dark blue and the top color is light blue.

Either way, they both shine bright.


Frosted Snowflake 3

Finale 4

Ta Da! Make your whole ceiling with these snowflakes and then after the party hand them out to your guests as party memorabilia. They will love you for it!

Good Luck!


To ask questions or have comments about this project, please email us at: projects@peaydesigns.com. If you have tried this project (as shown above) please let us know! Send pictures to show how yours turned out!!

2003© Peay Designs


<< Previous Contact us: info@peaydesigns.com Next >>